[Spring Cloud로 개발하는 마이크로서비스 애플리케이션(MSA)] Section 5. Catalogs and Orders Microservice

이 글은 인프런 Spring Cloud로 개발하는 마이크로서비스 애플리케이션(MSA) 강의를 들은 후에 정리한 글입니다.
(https://www.inflearn.com/course/%EC%8A%A4%ED%94%84%EB%A7%81-%ED%81%B4%EB%9D%BC%EC%9A%B0%EB%93%9C-%EB%A7%88%EC%9D%B4%ED%81%AC%EB%A1%9C%EC%84%9C%EB%B9%84%EC%8A%A4/dashboard)
Spring Cloud로 개발하는 마이크로서비스 애플리케이션(MSA) - 인프런 | 강의
Spring framework의 Spring Cloud 제품군을 이용하여 마이크로서비스 애플리케이션을 개발해 보는 과정입니다. Cloud Native Application으로써의 Spring Cloud를 어떻게 사용하는지, 구성을 어떻게 하는지에 대해
www.inflearn.com
이 글에서 설명되는 내용들은 모두 실제 강의와 다른 Spring Boot 3.1.2 버전입니다.
이번 섹션에서는 Users 서비스에 대한 기능 추가와 Catalogs, Orders를 위한 기능을 구현할 것이다.
Users Microservice - 사용자 조회 ①
전체 사용자를 조회하고, 특정 사용자 정보와 주문 내역을 조회하는 메서드를 만들어 볼 것이다.
그전에 일단 저번에 만들었던 Users Microservice를 API Gateway에 등록해 보겠다.
Users Microservice와 Spring Cloud Gateway 연동
먼저 상태 확인(health_check)을 위한 메서드에 포트 번호를 추가하기 위해 다음과 같이 변경한다.
// UserController.java
...
@GetMapping("/health_check")
public String status() {
    return String.format("It's Working in User Service on Port %s.",
    env.getProperty("local.server.port"));
}
...
apigateway-service의 yml 정보에 user-service 관련 내용을 추가한다.
# application.yml
...
spring:
...
  cloud:
    gateway:
      default-filters:
	  ...
      routes:
        - id: user-service
          uri: lb://USER-SERVICE
          predicates:
            - Path=/user-service/**
이제 user-service와 apigateway-service를 구동하면, 유레카 서버에서 다음과 같이 확인할 수 있다.

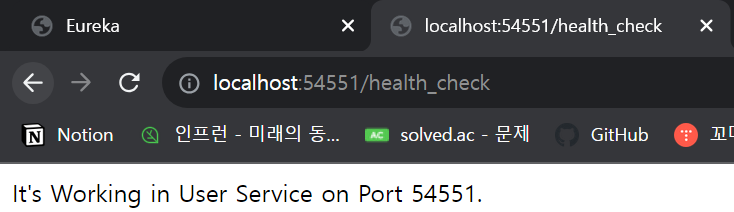
이제 추가한 health_check관련 메서드가 잘 작동되는지 확인해 보자.
그리고 apigatway-service를 사용해서도 이 메서드가 잘 작동되는지 확인해 보자.
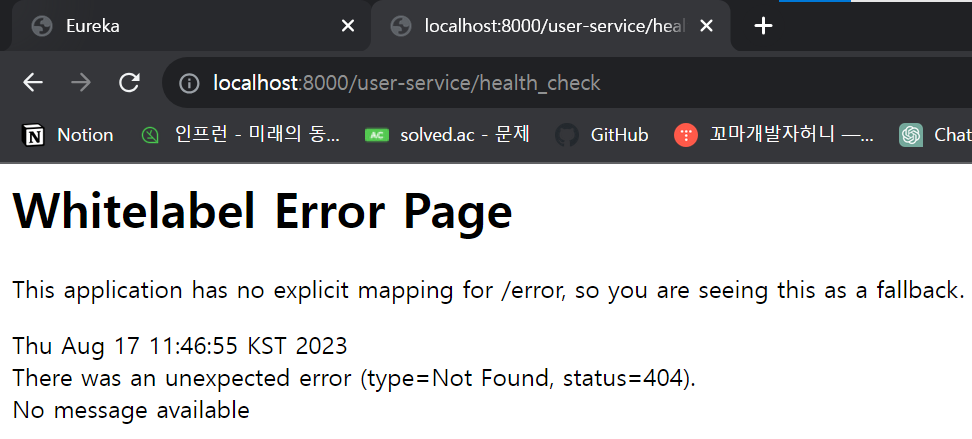
하지만 의도대로 잘 작동하지 않는다! 이는 user-service와 apigateway-serivce의 URI가 다르기 때문이다.
API Gateway를 통해 들어오는 요청 주소는 /user-service/health_check인데 우리가 설정해 놓은 health_check의 직접 호출 요청 주소는 /health_check이기 때문에 오류가 발생하는 것이다.
그래서 오류를 해결하기 위해 요청 주소를 아래와 같이 변경한다.
// UserController.java
...
@GetMapping("/user-service/health_check")
public String status() {
    return String.format("It's Working in User Service on Port %s.",
    env.getProperty("local.server.port"));
}
...
이제 다시 실행해 보면 아래와 같이 user-service에서의 직접 호출, API Gateway를 사용한 호출 모두 잘 실행됨을 확인할 수 있다.


Users Microservice - 사용자 조회 ②
이제 전체 사용자를 조회하고, 특정 사용자 정보와 주문 내역을 조회하는 메서드를 만들어 볼 것이다.
Users Microservice - 사용자 조회 ③
모든 요청에 대해 prefix를 달아주기 위해서 UserController 클래스의 상부에 @RequestMapping("/user-service")를 작성한다.
사용자에게 사용자에 대한 정보를 반환하는 객체인 ResponseUser를 아래와 같이 수정한다.
// ResponseUser.java
@Data
@JsonInclude(JsonInclude.Include.NON_NULL)
public class ResponseUser {
    private String email;
    private String name;
    private String userId;

    private List<ResponseOrder> orders;
}
vo 패키지에 특정 사용자의 Order 정보를 담아 반환하는 객체인 ResponseOrder를 추가한다.
// OrderResponse.java
@Data
public class ResponseOrder {
    private String productId;
    private Integer qty;
    private Integer unitPrice;
    private Integer totalPrice;
    private Date createdAt;

    private String orderId;
}
이제 새로운 기능을 처리할 메서드를 UserService 인터페이스에 정의해 보자.
// UserSerive.java
public interface UserService {
    UserDto createUser(UserDto userDto);
    UserDto getUserByUserId(String userId);
    Iterable<UserEntity> getUserByAll();
}
다음으로 정의한 메서드들을 구현한다.
// UserServiceImpl.java
...
@Override
public UserDto getUserByUserId(String userId) {
    UserEntity userEntity = userRepository.findByUserId(userId);
    if(userEntity == null) throw new UsernameNotFoundException("User not found");

    UserDto userDto = new ModelMapper().map(userEntity, UserDto.class);
    List<ResponseOrder> orders = new ArrayList<>();
    userDto.setOrders(orders);

    return userDto;
}

@Override
public Iterable<UserEntity> getUserByAll() {
    return userRepository.findAll();
}
...
서비스 단에서 userId를 이용해 user의 정보를 불러오기 위해 findByUserId 메서드를 UserRepository에 추가한다.
// UserRepository.java
public interface UserRepository extends CrudRepository<UserEntity, Long> {
    UserEntity findByUserId(String userId);
}
구현한 메서드를 실행시켜 주기 위해 Controller 계층에 아래 내용을 입력한다.
// UserController.java
...
@GetMapping("/users")
public ResponseEntity<List<ResponseUser>> getUsers(){
    Iterable<UserEntity> userList = userService.getUserByAll();
    List<ResponseUser> result = new ArrayList<>();

    userList.forEach(v -> {
        result.add(new ModelMapper().map(v, ResponseUser.class));
    });

    return ResponseEntity.status(HttpStatus.OK).body(result);
}

@GetMapping("/users/{userId}")
public ResponseEntity<ResponseUser> getUser(@PathVariable("userId") String userId){
    UserDto userDto = userService.getUserByUserId(userId);
    ResponseUser returnValue = new ModelMapper().map(userDto, ResponseUser.class);
    return ResponseEntity.status(HttpStatus.OK).body(returnValue);
}
...
이제 Postman에서 만든 API들을 테스트해 보자.
먼저 이전에 만든 회원가입 API를 사용해 회원가입을 두 번 진행 후에 테스트를 진행하였다.
전체 사용자 목록이 잘 출력됨을 확인할 수 있다.

개별 사용자 상세 정보 확인 API도 잘 작동함을 확인할 수 있다. orders의 경우 아직 주문 서비스는 구현하지 않았기에 비어있는 것이다.

Catalogs Microservice - 개요
Catalogs Microservice에서 구현할 내용들은 전체적으로 Users Serivce의 내용과 비슷하기 때문에 Users Service의 내용을 복사하여 이를 변경하는 방식으로 구현하도록 하겠다.
Catalogs Microservice - 기능 구현 ①
Spring Boot DevTools, Lombok, Spring Web, Spring Data JPA, H2 Database, Eureka Discovery Client 의존성을 추가하여 프로젝트를 만든다.
다음으로 아래와 같이 Modelmapper 관련 의존성도 pom.xml에 추가한다.
<dependency>
    <groupId>org.modelmapper</groupId>
    <artifactId>modelmapper</artifactId>
    <version>2.3.8</version>
</dependency>
application.yml에 프로젝트 관련 설정을 한다.
# application.yml
server:
  port: 0

spring:
  application:
    name: catalog-service
  h2:
    console:
      enabled: true
      settings:
        web-allow-others: true
      path: /h2-console
  datasource:
    url: jdbc:h2:mem:testdb
    username: sa
  jpa:
    hibernate:
      ddl-auto: create-drop
    show-sql: true
    defer-datasource-initialization: true
  sql:
    init:
      mode: always

eureka:
  instance:
    instance-id: ${spring.cloud.client.hostname}:${spring.application.instance_id:${random.value}}
  client:
    register-with-eureka: true
    fetch-registry: true
    service-url:
      default-zone: http://127.0.0.1:8761/eureka

logging:
  level:
    com.example.catalogservice: DEBUG
그리고 데이터를 삽입하기 위한 SQL문을 담은 data.sql 파일을 추가하자.
insert into catalog(product_id, product_name, stock, unit_price)
    values ('CATALOG-001', 'Berlin', 100, 1500);
insert into catalog(product_id, product_name, stock, unit_price)
    values ('CATALOG-002', 'Tokyo', 110, 1000);
insert into catalog(product_id, product_name, stock, unit_price)
    values ('CATALOG-003', 'Stockholm', 120, 2000);
Catalog 정보와 매핑되는 CatalogEntity 클래스를 jpa 패키지 아래에 생성한다.
// CatalogEntity.java
@Data
@Entity
@Table(name = "catalog")
public class CatalogEntity implements Serializable {
    @Id
    @GeneratedValue(strategy = GenerationType.IDENTITY)
    private Long id;

    @Column(nullable = false, length = 120, unique = true)
    private String productId;
    @Column(nullable = false)
    private String productName;
    @Column(nullable = false)
    private Integer stock;
    @Column(nullable = false)
    private Integer unitPrice;

    @Column(nullable = false, updatable = false, insertable = false)
    @ColumnDefault(value= "CURRENT_TIMESTAMP")
    private Date createdAt;
}
Catalog와 관련된 데이터를 위한 Repository를 마찬가지로 jpa 패키지에 생성한다.
// CatalogRepository.java
public interface CatalogRepository extends CrudRepository<CatalogEntity, Long> {
    CatalogEntity findByProductId(String productId);
}
dto 패키지 하단에 CatalogDto라는 클래스를 생성한다.
// CatalogDto.java
@Data
public class CatalogDto {
    private String productId;
    private Integer qty;
    private Integer unitPrice;
    private Integer totalPrice;

    private String orderId;
    private String userId;
}
마지막으로 vo 패키지 하단에 ResponseCatalog라는 클래스를 생성한다.
// ResponseCatalog.java
@Data
@JsonInclude(JsonInclude.Include.NON_NULL)
public class ResponseCatalog {
    private String productId;
    private String productName;
    private Integer unitPrice;
    private Integer stock;
    private Date createdAt;
}
Catalogs Microservice - 기능 구현 ②
이제 서비스 계층을 만들어보자.
service 패키지에 다음과 같은 CatalogService를 생성한다.
// CatalogService.java
public interface CatalogService {
    Iterable<CatalogEntity> getAllCatalogs();
}
다음으로 위의 인터페이스를 구현하는 구현체 CatalogServiceImpl을 생성한다.
// CatalogServiceImpl.java
@Data
@Slf4j
@Service
public class CatalogServiceImpl implements CatalogService{
    private final CatalogRepository catalogRepository;

    @Autowired
    public CatalogServiceImpl(CatalogRepository catalogRepository) {
        this.catalogRepository = catalogRepository;
    }

    @Override
    public Iterable<CatalogEntity> getAllCatalogs() {
        return catalogRepository.findAll();
    }
}
서비스 로직이 구현이 완료되었으므로, 이 로직을 사용할 수 있게 하는 Controller 계층을 아래와 같이 만든다.
@RestController
@RequestMapping("/catalog-service")
public class CatalogController {
    Environment env;
    CatalogService catalogService;

    @Autowired
    public CatalogController(Environment env, CatalogService catalogService) {
        this.env = env;
        this.catalogService = catalogService;
    }

    @GetMapping("/health_check")
    public String status(){
        return String.format("It's working in Catalog Service on Port %s",
                env.getProperty("local.server.port"));
    }

    @GetMapping("/catalogs")
    public ResponseEntity<List<ResponseCatalog>> getCatalogs(){
        Iterable<CatalogEntity> catalogList = catalogService.getAllCatalogs();

        List<ResponseCatalog> result = new ArrayList<>();
        catalogList.forEach(v->{
            result.add(new ModelMapper().map(v, ResponseCatalog.class));
        });
        return ResponseEntity.status(HttpStatus.OK).body(result);
    }
}
이제 실행 후 H2 DB에 SQL을 사용하여 삽입한 데이터들이 잘 들어가 있는지 확인해 보자.

apigateway-service의 application.yml에 다음 내용을 추가한다.
spring:
  ...
  cloud:
    gateway:
	...
    routes:
        ...
        - id: catalog-service
          uri: lb://CATALOG-SERVICE
          predicates:
            - Path=/catalog-service/**
Postman에서 Category를 모두 불러오는 API를 요청해 본다.
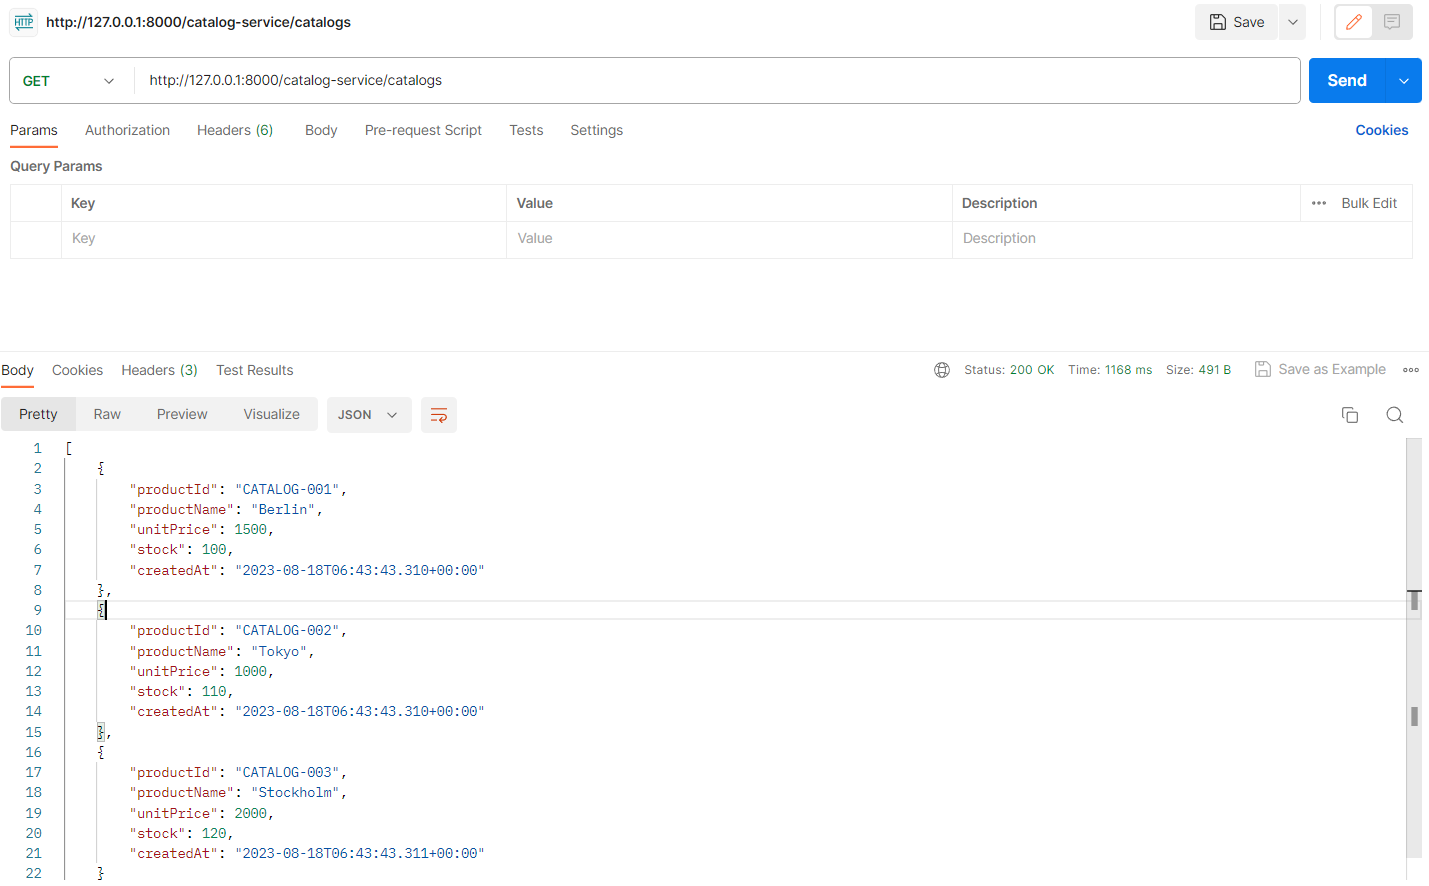
이로써 Catalogs Microservice도 구현을 완료하였다.
Orders Microservice - 개요
마지막으로 Orders Microservice의 내용을 구현해 보자.
Orders Microservice - 기능 구현 ①
Catalog Service와 동일하게 Spring Boot DevTools, Lombok, Spring Web, Spring Data JPA, H2 Database, Eureka Discovery Client 의존성을 추가하여 프로젝트를 만든다.
아래 코드를 pom.xml에 추가하여 ModelMapper 의존성을 추가한다.
<dependency>
    <groupId>org.modelmapper</groupId>
    <artifactId>modelmapper</artifactId>
    <version>2.3.8</version>
</dependency>
다음과 같이 application.yml 파일을 작성한다.
# application.yml
server:
  port: 0

spring:
  application:
    name: order-service
  h2:
    console:
      enabled: true
      settings:
        web-allow-others: true
      path: /h2-console
  datasource:
    url: jdbc:h2:mem:testdb
    username: sa
  jpa:
    hibernate:
      ddl-auto: update
    show-sql: true

eureka:
  instance:
    instance-id: ${spring.cloud.client.hostname}:${spring.application.instance_id:${random.value}}
  client:
    register-with-eureka: true
    fetch-registry: true
    service-url:
      default-zone: http://127.0.0.1:8761/eureka

logging:
  level:
    com.example.orderservice: DEBUG
jpa 패키지의 하단에 OrderEntity 클래스를 생성한다.
// OrderEntity.java
@Data
@Entity
@Table(name = "orders")
public class OrderEntity implements Serializable {
    @Id
    @GeneratedValue(strategy = GenerationType.IDENTITY)
    private Long id;

    @Column(nullable = false, length = 120, unique = true)
    private String productId;
    @Column(nullable = false)
    private Integer qty;
    @Column(nullable = false)
    private Integer unitPrice;
    @Column(nullable = false)
    private Integer totalPrice;
    @Column(nullable = false)
    private String userId;
    @Column(nullable = false, unique = true)
    private String orderId;

    @Column(nullable = false, updatable = false, insertable = false)
    @ColumnDefault(value= "CURRENT_TIMESTAMP")
    private Date createdAt;
}
이어서 jpa 패키지 하단에 OrderRepository를 생성한다.
// OrderRepository.java
public interface OrderRepository extends CrudRepository<OrderEntity, Long> {
    OrderEntity findByOrderId(String orderId);
    Iterable<OrderEntity> findByUserId(String userId);
}
다음으로 dto 패키지 하단에 OrderDto를 생성한다.
// OrderDto.java
@Data
public class OrderDto implements Serializable {
    private String productId;
    private Integer qty;
    private Integer unitPrice;
    private Integer totalPrice;

    private String orderId;
    private String userId;
}
또한 vo 패키지 하단에 아래 내용을 입력한다.
// ResponseOrder.java
@Data
@JsonInclude(JsonInclude.Include.NON_NULL)
public class ResponseOrder {
    private String productId;
    private Integer qty;
    private Integer unitPrice;
    private Integer totalPrice;
    private Date createdAt;

    private String orderId;
}
이제 서비스 계층을 생성해 보자. 먼저 OrderService를 service 패키지 하단에 생성한다.
// OrderService.java
public interface OrderService {
    OrderDto createOrder(OrederDto orderDetails);
    Iterable<OrderEntity> getAllOrders();
}
해당 인터페이스를 구현하는 OrderServiceImpl을 생성한다.
// OrderServiceImpl.java
@Service
public class OrderServiceImpl implements OrderService{
    private final OrderRepository orderRepository;

    @Autowired
    public OrderServiceImpl(OrderRepository orderRepository) {
        this.orderRepository = orderRepository;
    }

    @Override
    public OrderDto createOrder(OrderDto orderDto) {
        orderDto.setOrderId(UUID.randomUUID().toString());
        orderDto.setTotalPrice(orderDto.getUnitPrice() * orderDto.getQty());

        ModelMapper mapper = new ModelMapper();
        mapper.getConfiguration().setMatchingStrategy(MatchingStrategies.STRICT);
        OrderEntity orderEntity = mapper.map(orderDto, OrderEntity.class);

        orderRepository.save(orderEntity);

        OrderDto returnValue = mapper.map(orderEntity, OrderDto.class);
        return returnValue;
    }

    @Override
    public OrderDto getOrderByOrderId(String orderId) {
        OrderEntity orderEntity = orderRepository.findByOrderId(orderId);
        OrderDto orderDto = new ModelMapper().map(orderEntity, OrderDto.class);
        return orderDto;
    }

    @Override
    public Iterable<OrderEntity> getOrdersByUserId(String userId) {
        return orderRepository.findByUserId(userId);
    }
}
Orders Microservice - 기능 구현 ②
구현한 기능들을 사용하기 위한 Controller를 추가한다.
// OrderController.java
@RestController
@RequestMapping("/order-service")
public class OrderController {
    Environment env;
    OrderService orderService;

    @Autowired
    public OrderController(Environment env, OrderService orderService) {
        this.env = env;
        this.orderService = orderService;
    }

    @GetMapping("/health_check")
    public String status() {
        return String.format("It's working in Order Service on Port %s",
                env.getProperty("local.server.port"));
    }

    @PostMapping("/{userId}/orders")
    public ResponseEntity<ResponseOrder> createOrder(@PathVariable("userId") String userId,
                                                     @RequestBody RequestOrder orderDetails){
        ModelMapper mapper = new ModelMapper();
        mapper.getConfiguration().setMatchingStrategy(MatchingStrategies.STRICT);

        OrderDto orderDto = mapper.map(orderDetails, OrderDto.class);
        orderDto.setUserId(userId);
        OrderDto createdOrder = orderService.createOrder(orderDto);

        ResponseOrder responseOrder = mapper.map(createdOrder, ResponseOrder.class);

        return ResponseEntity.status(HttpStatus.CREATED).body(responseOrder);
    }
}
Order 생성을 위해 사용할 Order 관련 Dto를 vo 패키지 아래에 생성하자.
// RequestOrder.java
@Data
public class RequestOrder {
    private String productId;
    private Integer qty;
    private Integer unitPrice;
}
특정 유저의 모든 주문 정보를 불러오는 메서드도 Controller에 추가하자.
// OrderController.java
...
@GetMapping("/{userId}/orders")
public ResponseEntity<List<ResponseOrder>> getOrder(@PathVariable("userId") String userId){
    Iterable<OrderEntity> orderList = orderService.getOrdersByUserId(userId);

    List<ResponseOrder> result = new ArrayList<>();
    orderList.forEach(v -> {
        result.add(new ModelMapper().map(v, ResponseOrder.class));
    });

    return ResponseEntity.status(HttpStatus.OK).body(result);
}
...
다음으로 apigateway-service에 order-service를 등록하기 위해 application.yml에 다음과 같이 추가한다.
# application.yml
spring:
  ...
  cloud:
    ...
    routes:
        - id: user-service
          ...
        - id: catalog-service
          ...
        - id: order-service
          uri: lb://ORDER-SERVICE
          predicates:
            - Path=/order-service/**
...
모든 서비스를 구동하고, user를 등록한 후에 회원 정보를 사용해 다음과 같이 order를 등록해 보자.
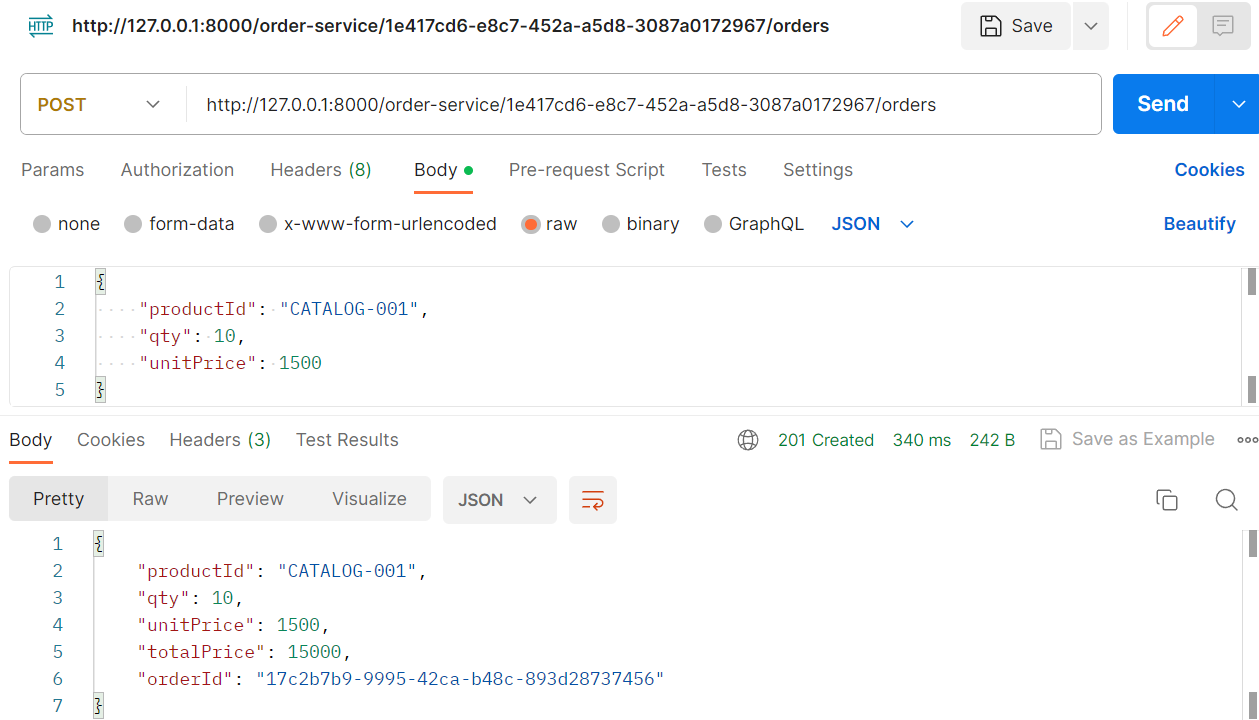
잘 주문 내역이 등록되었는지 확인해보면 잘 등록됐음을 아래의 API를 통해 확인할 수 있다.

H2 DB에서도 확인할 수 있다.
